How to Create an Additional Web Disk Account in cPanel?
You can use cPanel login details to access your Web Disk. You can also create an additional account for accessing a specific directory on your account so that it can be useful for security purposes.
1. Log into your cPanel account. (eg: www.example.com/cPanel )
2. In the "Files" section, click the "Web Disk" icon.
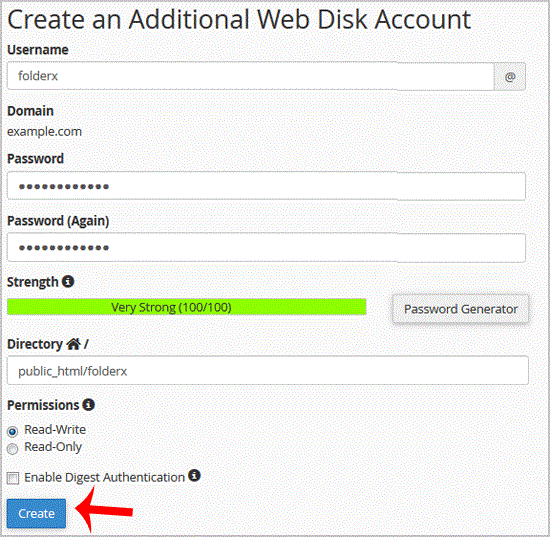
3. Under "Create an Additional Web Disk Account", enter the details of the new account you wish to create.
Username: folderx
Password: Enter your new password or click the Password Generator button to generate a random password.
Directory: You can leave it blank but it will grant access to the entire directory. If you wish to allow access to only a specific folder, enter the folder location, such as public_html/folderx (the user will only able to access /folderx).
Permissions: Select your option.
Note: If you are using the Windows OS, you will need to mark "Enable Digest Authentication". However, if the server has an SSL certificate signed by a recognized certificate authority and you are able to make an SSL connection over port 2078, you do not need to enable this.
4. Now click on the "Create" button and your new additional account will be created. You can use your new login details to access your Web Disk.
